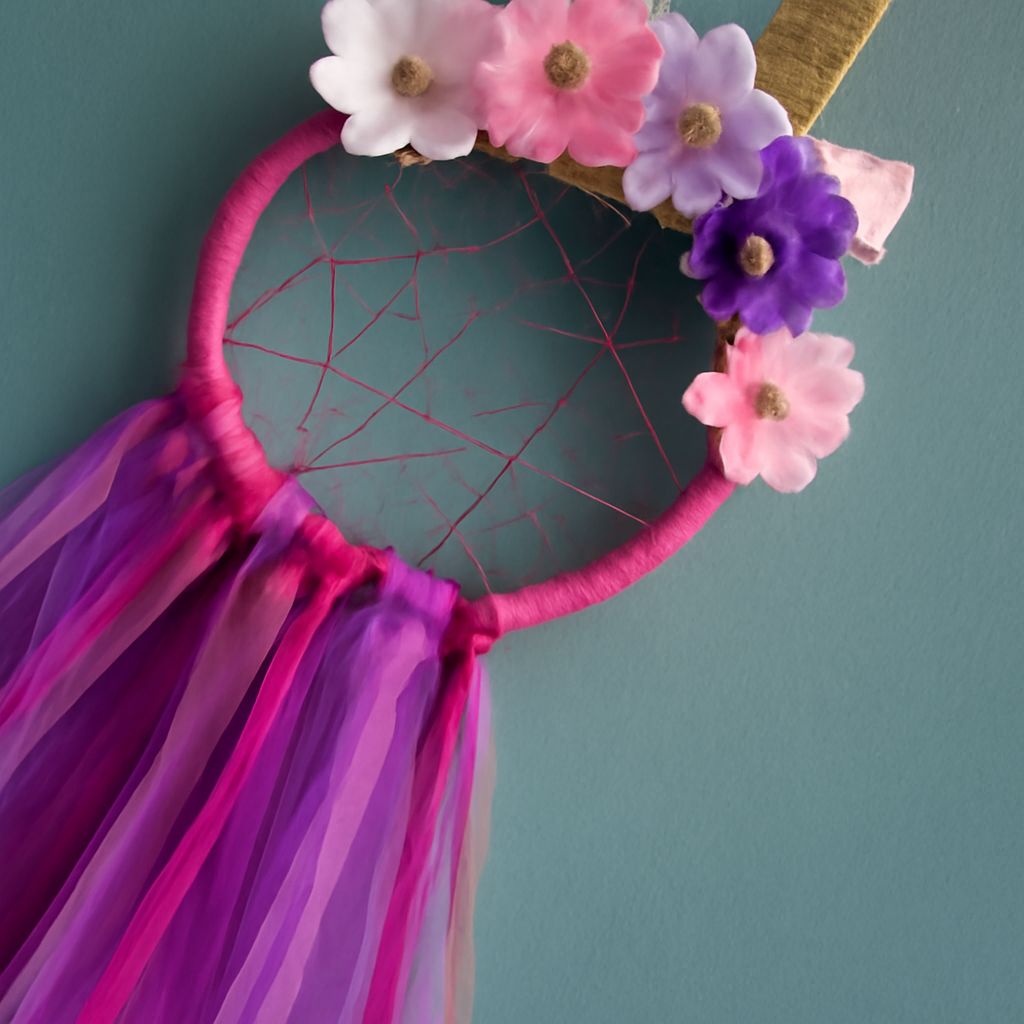
Making a dreamcatcher at home is a creative and rewarding DIY project. With just a few materials and a little patience, you can craft a beautiful homemade dream catcher that’s both decorative and meaningful. Whether you’re searching for a simple dream catcher tutorial or want to explore more advanced dreamcatcher diy techniques, this step-by-step guide will help you create a personalized accessory to hang above your bed or gift to someone special.
Materials Needed for a Homemade Dream Catcher
Before you start your how to make a dreamcatcher journey, gather the following supplies. Many items are available at craft stores or can be repurposed from home:
- Hoop: 6–8 inch metal or wooden embroidery hoop. You can use a metal ring, wooden hoop, or even a flexible branch bent into a circle.
- String or Cord: Choose cotton cord, waxed thread, embroidery floss, or natural twine. For a classic look, white or beige works well, but colored thread adds personality.
- Feathers: Natural, dyed, or synthetic feathers for accents.
- Beads: Wooden, glass, or plastic beads to decorate the web and tassels.
- Scissors: Sharp scissors for cutting thread and trimming materials.
- Glue (optional): Clear craft glue can secure knots or affix decorations.
- Decorative Elements (optional): Ribbons, charms, shells, or lace for extra flair.
Have all materials organized before you begin. Laying out your supplies makes the construction process smoother and lets you experiment with colors and textures easily.
Step-by-Step Dream Catcher Tutorial
Create the Hoop
Start by preparing the base of your dreamcatcher. If using a flexible branch or vine, soak it in water for an hour to make it pliable. Form it into a circle about 6–8 inches in diameter and secure the ends with wire or string. For a metal or wooden hoop, simply use as-is.
To wrap your hoop, tie the end of your string to the ring. Wind the string tightly around the entire hoop to cover it completely, knotting at the end. This creates a polished, finished look and gives you a good base to work from.
Weave the Web
Cut a long length of cord or thread (about 5 times the circumference of your hoop is a safe estimate). Tie the end securely to the hoop. Begin weaving by looping the thread over the hoop every 2–3 inches, pulling it through to create a series of evenly spaced “spokes.” Continue around the hoop until you meet your starting point.
For the next round, instead of looping over the hoop, loop over the center of each section of the first round’s thread. Pull gently to create tension, shaping a web. Continue spiraling inward, looping over the previous round’s thread, and pulling through the center each time. Add beads as you weave by threading them onto your string before making a loop, spacing them decoratively.
When you reach the center (a small opening is traditional), tie a secure knot and trim any excess thread. A drop of glue can help hold the final knot in place.
Add Decorative Elements
Cut 3–5 lengths of string or ribbon for the hanging tassels—each about 8–12 inches. Attach them to the bottom of the hoop with lark’s head knots or by tying securely. Thread beads and attach feathers to each string, using glue to secure if needed. Mix and match colors, bead sizes, and feather shapes for a unique look.
Top off your homemade dream catcher by tying a loop of string at the top of the hoop so it’s ready to hang.
Dreamcatcher DIY Tips and Customization Ideas
Personalizing your dreamcatcher diy project makes it truly special. Try these ideas:
- Color Play: Use dyed thread, painted hoops, or colorful beads to match your room or personal style.
- Thematic Charms: Add small charms or crystals with personal meaning—such as moon, star, or animal motifs.
- Eco-Friendly: Use upcycled materials, such as twigs, scrap fabric, or vintage lace for a sustainable touch.
- Size Variation: Make mini dreamcatchers for car mirrors or larger ones as dramatic wall art.
If you’re making dreamcatchers with kids, use child-safe materials and supervise closely, especially when handling scissors or beads. Experiment with single or multiple webs, asymmetrical layouts, or layered feathers for custom effects.
Keep your workspace organized, and don’t be afraid to start over if your web gets uneven. Practice leads to better results, and imperfections add handmade charm.
Meaning and Uses of Dreamcatchers
Dreamcatchers originated with the Ojibwe (Chippewa) people and have become meaningful symbols across many cultures. Traditionally, dreamcatchers are hung above the bed to filter dreams—allowing good dreams to pass through the web and slide down feathers while trapping bad dreams until morning light.
Today, dreamcatchers are popular as both spiritual talismans and decorative art. Many people use them for bedroom decor, wall hangings, or as thoughtful homemade gifts. The act of making a dreamcatcher can be a mindful, meditative process, making it a popular activity for all ages.
By learning how to make a dreamcatcher, you not only craft a unique accessory but also connect with the rich tradition and symbolism that dreamcatchers represent. Enjoy the process and let your creativity shine through every knot and bead.