DIY paper making is a fun, sustainable way to recycle scrap paper into beautiful, one-of-a-kind sheets for crafts, cards, or stationery. Learning how to make homemade paper at home requires only simple materials and a bit of patience. Below, you’ll find everything you need to get started, plus tips for customizing your creation.
Materials and Tools
Gather these basic supplies before you begin your DIY paper project:
- Scrap paper: Old printer paper, envelopes, paper bags, or newspaper all work well. Avoid glossy papers.
- Blender or food processor: For pulping the paper. A dedicated craft blender is ideal as the process can dull blades.
- Mold and deckle: This is a frame (the mold) and a removable screen (the deckle) to shape your paper. You can make one using two same-sized picture frames and a piece of fine mesh or pantyhose.
- Large basin or tub: For soaking and mixing the pulp.
- Clean dish towels or felt sheets: For pressing and drying your paper sheets.
- Sponge: To remove excess water.
- Rolling pin or heavy book: For pressing the paper flat.
- Optional: Dried flowers, threads, food coloring, or natural dyes for decoration.
Having all materials ready will make the papermaking process smoother from start to finish.
Preparing the Paper Pulp
Start your homemade paper by making a pulp:
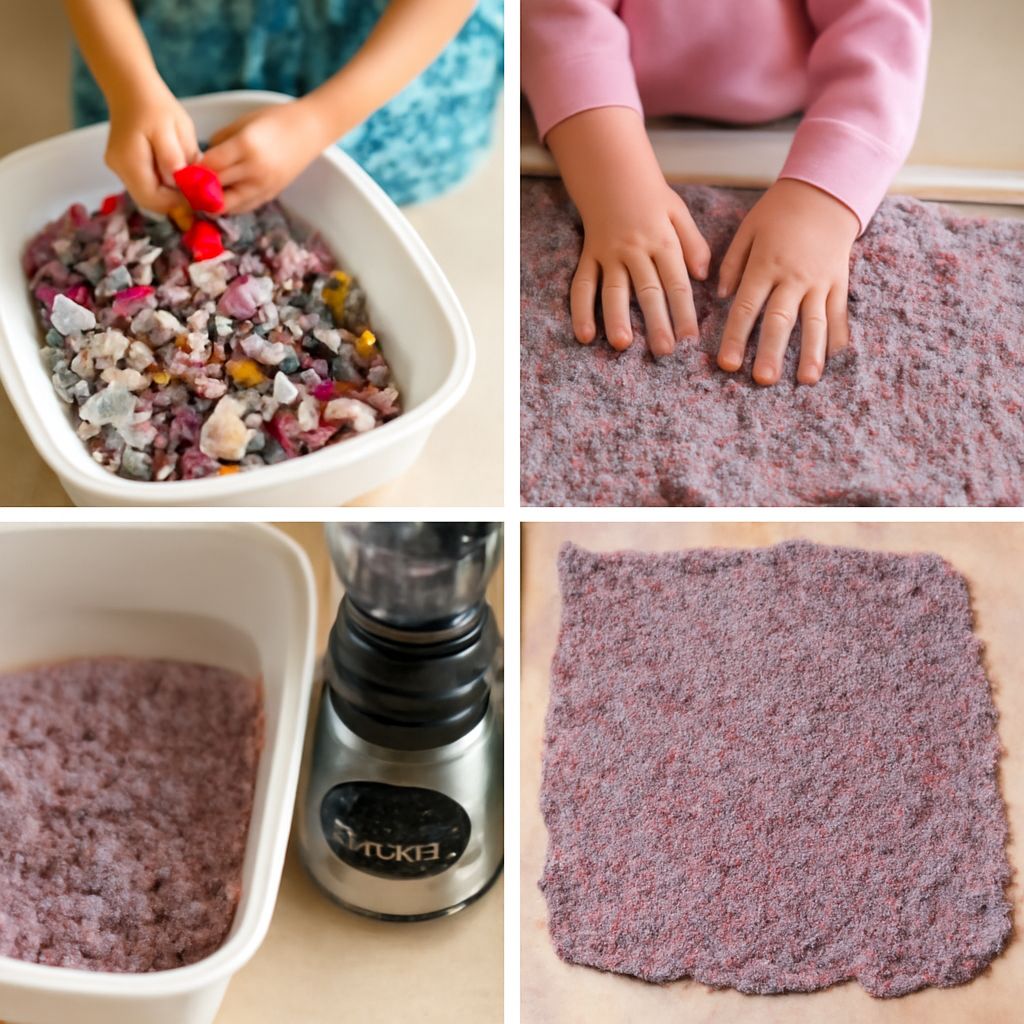
- Step 1: Tear your scrap paper into small pieces, about 1-inch squares. The more you shred, the smoother your finished paper will be.
- Step 2: Soak the paper bits in warm water for at least 30 minutes or up to a few hours. This softens the fibers and makes blending easier.
- Step 3: Transfer soaked paper and enough water to cover it into your blender. Blend on a medium setting until you have a thick, even pulp. If the blender sticks or struggles, add more water as needed.
Once your pulp is ready, pour it into a large basin filled with about 2–3 inches of water. Stir to evenly disperse the pulp throughout the water. This will help create uniform paper thickness when you start forming the sheets.
How to Make Homemade Paper
Forming the Sheet
With your pulp in the basin, slide your mold and deckle into the water at a slight angle. Quickly level the frame below the surface and gently shake it side to side to distribute the fibers evenly. Lift the mold and deckle straight up, letting excess water drain. The pulp should cover the screen in a thin, even layer—if not, dip again or add more pulp to the basin for thicker sheets.
Remove the deckle carefully so the wet sheet stays on the screen. If you want to add decorative touches, sprinkle flower petals, seeds, or threads on the wet pulp surface now and gently press them in with your fingers.
Pressing and Drying
Lay a clean towel or felt sheet on a flat surface. Flip the mold over onto the towel so the wet paper touches the fabric. Gently lift the mold away, leaving the wet paper sheet behind. Place another piece of towel or felt over the paper, then press firmly using a sponge to soak up excess water.
Once pressed, transfer your paper (still on its towel or felt) to a dry spot. Place a heavy book or use a rolling pin on top to flatten the sheet further. Leave the paper to dry for at least 24 hours. When fully dry, peel it away from the towel. Your homemade paper is ready to use.
Tips for Customizing Your Paper
Homemade paper can be as unique as your imagination. Try these ideas to personalize your sheets:
- Use colored scrap paper or add a few drops of food coloring for vibrant hues.
- Mix in natural fibers like cotton linters or recycled fabric for added texture and strength.
- Embed dried flowers, leaves, or glitter for decorative effects.
- Experiment with thickness by adjusting the pulp concentration in your basin—a thicker pulp yields sturdier sheets.
Practice and experimentation will help you refine your technique. The more you work with diy paper, the more consistent and creative your results will become. Whether you use your homemade sheets for cards, art, or journaling, the process lets you create truly one-of-a-kind paper at home.