A small loop at the base of an ear wire determines how a pendant hangs: facing one direction, it can present a flat charm toward the viewer; turned another way, it may leave the charm edge-on. That tiny connection deserves as much attention as the curve that passes through the ear.
Hooks for earrings come in different lengths, wire thicknesses, finishes, and materials. A suitable ear hook must fit the piercing comfortably, support the intended drop, and connect to it without an obvious gap. A few measurements and a careful assembly test make the difference visible in the finished pair.
Earring Hook Anatomy: Curve, Tail, and Loop
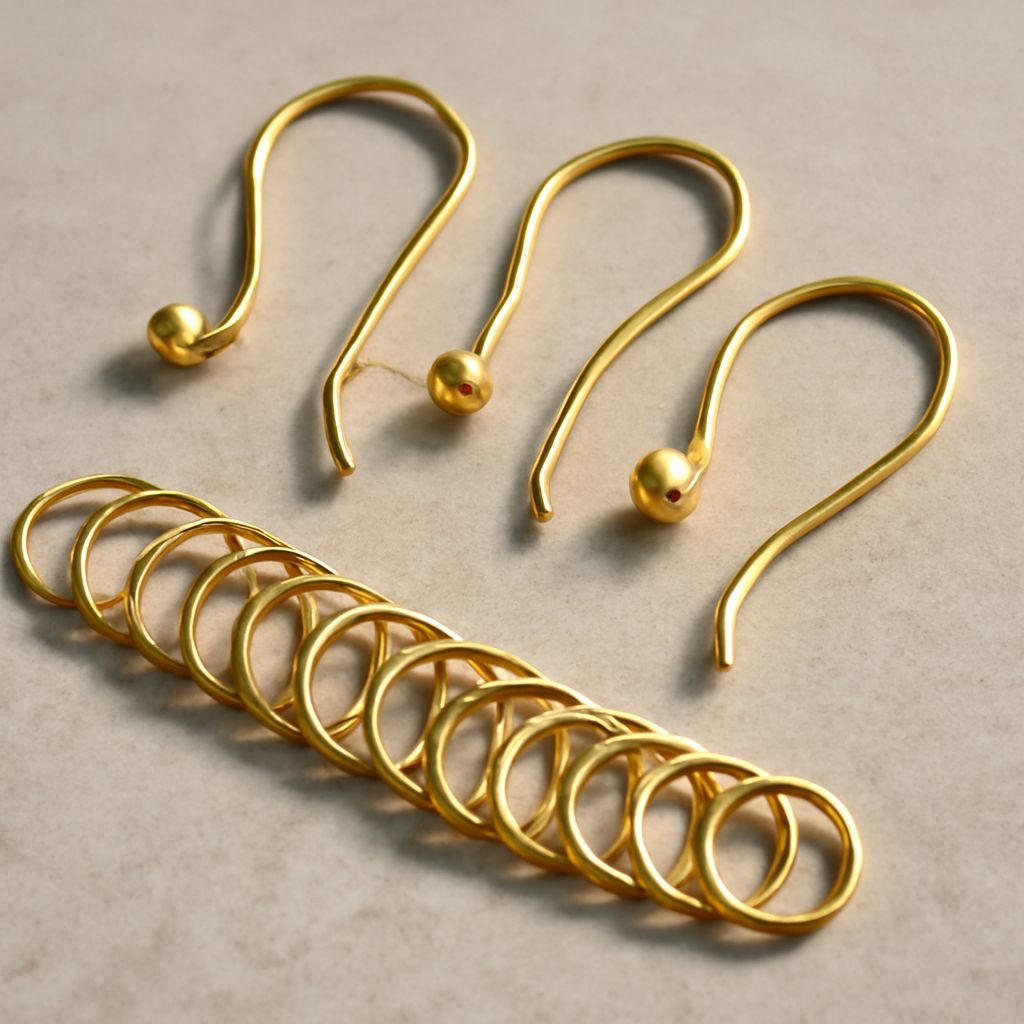
A fishhook is a curved wire with a front section, a bend that rests in a pierced lobe, and a tail extending behind it. The front often ends in a small loop for attaching a pendant. Some designs add a decorative coil or bead above that loop; others leave the wire plain. The curve remains visible as part of the finished earring, so its shape and finish contribute to the overall design.
Longer tails may offer more material behind the ear than short ones, while an optional compatible silicone stopper can add resistance to slipping. A hook remains an open form, however, and its fit depends on the individual ear and activity. For an enclosed fastening, a leverback has a hinged piece that closes behind the lobe; it should be selected and assembled according to its own mechanism.
Examine the small attachment loop before ordering earring hooks. An open loop has a seam and can usually be twisted sideways to receive a component. A closed or soldered loop has no accessible opening and needs another connector, such as an open jump ring. A jump ring is a small circle of wire with a split; its inside diameter must accommodate both connected parts.
Choose Dimensions for the Ear and the Pendant
Overall length describes the hook from top to bottom, but it does not tell the whole story. Check the depth and width of the curve, the length of the rear tail, and the space between front and back. An earring hook that looks delicate in a product photo may sit differently once the pendant is attached. Compare a supplier’s dimensions with a comfortable pair already worn by the intended wearer.
Wire gauge describes thickness. The numbering system should be identified by the supplier because gauge conventions vary; the diameter in inches or millimeters is a more direct comparison. The wire passing through the piercing should suit the wearer, while the attachment loop must also be strong enough for the intended pendant. A fine wire can look light and graceful with a small bead; a substantial drop needs a fitting and connector appropriate to its weight.
Loop orientation affects presentation. If the hook’s loop and the pendant’s top loop lie in the same plane, the pendant may hang sideways. A jump ring can turn the connection by a quarter turn and allow a flat charm to face forward. Assemble one sample and hold it as it will hang before making the second earring; the position of the loops matters more than the label on the packet.
Materials and Surface Finish
Stainless steel earring hooks are a practical choice for a cool silver-colored finish and corrosion resistance. Stainless steel is a family of alloys, however, so the precise grade and any coating should be checked with the supplier. The Nickel Institute notes that some corrosion-resistant stainless steels release very little nickel; stainless does not automatically mean nickel-free. A wearer with a known sensitivity needs the actual composition and relevant information about nickel release, rather than a broad material label alone.
Steel ear wires may be polished, brushed, or coated to look gold-colored. Ask whether the color is a surface treatment and what sits beneath it. Scratches or wear can change the appearance of a coating over time. A plain polished stainless ear wire can visually recede beside a bright pendant, while a dark or warm-colored finish can become an intentional part of the composition.
When comparing steel hooks for earrings with the pendant, consider both material and color. A silver-colored hook and an antique-finish charm may create a deliberate contrast; a closely matched pair gives a quieter result. Check the connecting ring too, since its metal touches the other components and remains visible at the top of the drop.
Attach and Finish a Drop
Place two smooth-jaw chain-nose or flat-nose pliers beside the seam of an open loop or jump ring. Grip one side with each tool and twist the sides slightly past one another, just enough to pass the pendant’s loop through. Do not pull the ends directly apart: that distorts the circle. Fire Mountain Gems’ illustrated instructions show the same sideways motion for a jump ring.
Add the pendant and, if needed, the ear wire to the open connector. Reverse the twist until the ends meet flush, then inspect the seam in good light. The pendant should move freely without a gap large enough for its loop to escape. If the hook’s loop is closed, use an appropriately sized open connector rather than trying to force the fixed loop apart. Replace any part that has become distorted or cannot close neatly.
Finish both earring hooks as a matched pair: compare their height, the direction of the drops, and the way the connections move. Check for rough wire ends or sharp edges before wearing them. Wipe away handling marks with a soft cloth appropriate to the finish, and store the pair so the pendants do not twist against the wires.
For the final check, choose a curve and wire diameter suited to the wearer, confirm the material and finish, and match the loop to the pendant’s size and orientation. Test the connection under light movement, check that the seam meets cleanly, and compare the two finished drops side by side.